Tabs

20.12.16

May all your Christmases be White

5 more sleeps until Santa visits :)

Funny story about this card...... I made the "bauble' with the Ranger white enamel dots and they were PERFECT!!! I was jumping up and down and patting myself on the back at how AWESOME I was!! Then I placed my handiwork on the table to dry and accidentally put something over the top and it all stuck to it arggghhh I did it again, but this time I used pearls as well to give it some texture.
No Dramas all done and then once I had taken a pic, the bow was a little loose, so I grabbed my trusty glossy accents to adhere that sucker good!  I gave the top a little tug and the WHOLE bottle spilled over the top of the card...... just wasn't meant to be :)  Anyway head on over to Scrapbook Boutique to purchase all the product used and see instructions too.


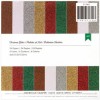
* Trim neena white cardstock 10cm x 28 cm and fold in half and set aside
* Trim red cardstock 10cm x 14cm 
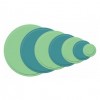
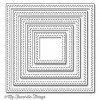
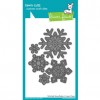
* Die cut with Spellbinders nestabilities circles.  One black and a smaller one in red.
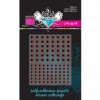
* randomly place pearls on red die cut circle
* With Ranger Enamel dots Glacier White randomly squirt dots all over red die cut and leave to dry.
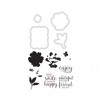
* die cut MFT bow in black cardstock and assemble.
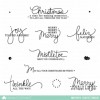
* Stamp sentiment along center bottom with black onyx versafine.
* Once dry, adhere top circle to bottom circle and leave a little off centre.
* Foam dots on the back of the black and adhere to red cardstock base.
*adhere some red cord  just underneath the black circle and wind around to back of red card.
* Sandwich between base and front with double sided tape.
*Adhere bow with glossy accents to keep secure.


13.12.16

A gift card is always appreciated :)

Hi there!  As usual, I am way behind with my Christmas gifts and I know that money or a gift card is always appreciated.  I decided to make a few gift card envelopes in anticipation of my "go to" presents!!  They are super easy to make and quick too!  I have gone with the cliche Santa's belt for this one but you could use a variety of colours and a circle punch with the recipient's initial (if you were making a few)  head on over to Scrapbook Boutique for the details on how to make and products used too!


1.12.16

Christmas....A time for making memories :)

Hello there!! I must be getting old because all I say on the first of every month, I say "Goodness, it's (insert month) already....hasn't this year gone fast!"  SERIOUSLY THOUGH so fast!!  I am going to start my December Daily today (again) and hopefully I will be able to finish it.  I did it last year.  I bought everything, binder, plastic folders, inserts, took photos, developed photos but just didn't put it all together (it is on my to do list).......

I absolutely love how this card turned out!!  I looks very pretty♥   Head on over to Scrapbook Boutique  for all the details on this card as well as products used too!!


* Trim Neenah white cardstock 10cm x 28 cm and fold in half
* Die cut Spellbinders Flag (this will be our tree base)
* With the snowflake die cut Teresa Collins Nine & Co Shine paper.  It has a gorgeous gold stripe and perfect shimmer look for the tree.
* Adhere randomly with glossy accents to cover the whole tree base.
* once dry, turn over and with scissors cut off the overhang, so you have tree shape.
* Adhere with glossy accents Tinsel & Co Sequins randomly over "tree" and in each sequin pop in a little red bling.
* Die cut smallest MFT star with gold glitter paper and adhere to top of tree.
* Stamp sentiment along centre bottom of card with versafine black onyx
*raise tree with foam dots and adhere just above the sentiment.